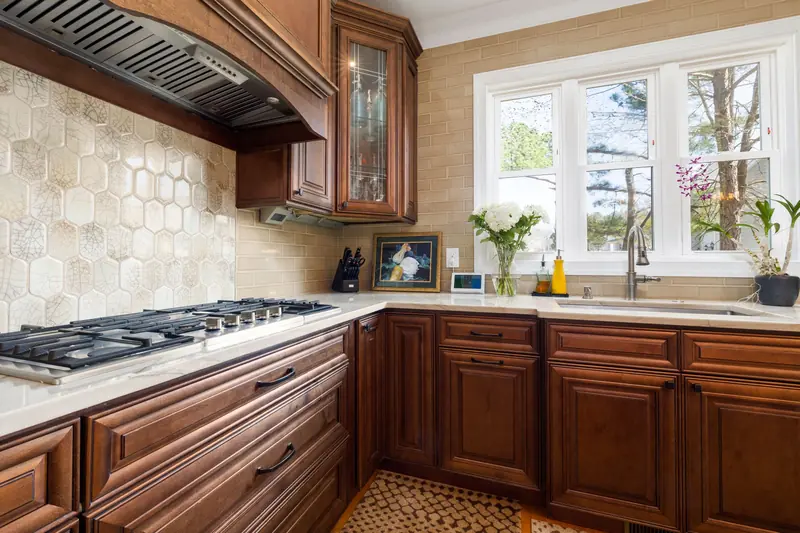

Refacing is far less disruptive than a remodel. There’s no demolition, and the kitchen stays mostly usable. Still, a little planning makes the 3–5 installation days go faster and keeps your household running. Here’s how to prepare your kitchen for refacing, step by step, for homeowners in Chicagoland and Wisconsin getting ready for install day.
Your timeline from measure to install
After the precision measure, your doors, drawer fronts and veneer are made to order, which takes about 4–6 weeks. Your project manager confirms the installation dates once your order is scheduled and stays your point of contact through the final walk-through. Use those weeks to plan. The hands-on prep happens in the last few days.
Empty the cabinets: which ones and when
Every cabinet and drawer getting new doors, drawer fronts or veneer needs to be empty. The installers take off the doors and work on the face frames and inside the openings to set new hinges and glides. In most kitchens, that means all of them.
- Base cabinets, wall cabinets and drawers: empty completely, including the sink base and the cleaning products under it.
- Cabinets getting new drawer boxes, pull-outs or organizers: clear out everything, shelves included, since the interior is being fitted.
- Tops of wall cabinets: take down decor, baskets and anything stored up there, especially if crown molding is going on.
- Anything attached to the cabinets: paper towel holders, under-cabinet radios, knife strips, hooks and child-safety latches. Remove what you can and point out anything you can’t.
- Countertops: clear off small appliances, canisters and the dish rack. Counters get covered during the work, but they need to be clear first.
- Cabinets that aren’t part of the project, such as a separate bar or laundry cabinet, can usually stay as they are. Confirm with your project manager.
Timing: pack the things you rarely use, like serving pieces, holiday dishes and backup supplies, about a week ahead. Empty everything else the day before installation. Pack by zone (baking, spices, plates, cleaning), label the boxes, and unpacking takes an hour instead of a weekend. Stack the boxes in a room off the path between the entry and the kitchen.
Set up a temporary kitchen
Unless countertops are also being replaced, your sink and appliances stay connected, so you keep your refrigerator, and the kitchen is generally usable again once the day’s work is cleaned up. During working hours, though, the kitchen is a job site. Set up a simple station in the dining room or another nearby spot:
- The coffee maker, a microwave or toaster oven, and an electric kettle.
- A bin with a few plates, bowls, mugs, utensils, a cutting board and a knife.
- Paper towels, dish soap, a small trash can and a recycling bag.
- Breakfast food, snacks and drinks, plus a short list of easy dinners for the installation days.
Run the dishwasher in the evening so it’s empty in the morning, and keep counters clear overnight so the crew can start right away.
Pets and kids
Installation involves saws, an air compressor and nail guns, and a crew going in and out of the house. Keep pets in a closed room or crate away from the kitchen and the entry, or arrange a sitter or daycare for anxious dogs. Tell the crew where pets are so nobody opens the wrong door.
Young children should stay out of the work area entirely. Tools, fasteners and cut-offs are no place for small hands. If a little one naps at home, ask your project manager whether the noisiest work can be planned around nap time.
Parking and access
- Save driveway or curb space near the door for the installation van.
- Clear a path from the entry to the kitchen: shoes, rugs, coats and small furniture out of the way.
- Installers trim veneer and moldings on site, so they need a small cutting area. A garage bay or a covered spot near the entry works well; let your project manager know what you have.
- In a condo or townhome, check building rules for elevator reservations, loading access, parking passes and allowed work hours, and give management the dates.
- Share gate codes and alarm instructions, and decide who will let the crew in each morning.
What stays connected
With refacing alone, the sink, faucet, dishwasher, range and refrigerator all stay connected. The cabinet boxes don’t move, so plumbing and wiring aren’t touched. If an end panel sits beside the range or refrigerator, the installer may slide the appliance out briefly to cover the panel, then push it back.
If you’re also replacing countertops, plan for one more step. Countertops are templated after the cabinets are refaced, stone fabrication takes about 7–10 days, and installation takes about one day. On that day the sink is disconnected while the old tops come off and the new ones go in, so plan a day without it. A new sink and faucet can go in at the same time.
Noise, dust and the daily schedule
Expect noise in bursts: saws when trimming veneer and moldings, the compressor and nail guns when attaching trim, drills when hanging doors. It’s loud for minutes at a time, not all day. Because nothing is demolished, there’s far less dust than in a remodel. Floors and counters are covered, and the work area is cleaned at the end of every day.
A typical 3–5 day installation runs roughly in this order:
- Day 1: floors and counters protected; old doors, drawer fronts and hinges removed; frames prepped.
- Days 2–3: veneer applied to face frames and end panels; new drawer boxes, pull-outs and any added cabinets installed.
- Days 3–4: new doors and drawer fronts hung, hinges and glides adjusted, hardware installed.
- Final day: crown molding, light rail and lighting, touch-ups, final adjustments and cleanup.
Smaller kitchens move faster; kitchens with added cabinets or a lot of trim take longer. If you have questions on any day, your project manager is the person to ask.
The final walk-through
On the last day, you walk through the kitchen with your project manager. Take your time:
- Open and close every door and drawer. Soft-close hinges and glides should close quietly and evenly.
- Look along each run of cabinets. Gaps between doors should be even and the tops of doors level.
- Check that every knob and pull is tight and straight.
- Look at veneer edges and end panels, especially around the sink and dishwasher.
- Try the pull-outs, organizers and lighting.
Anything that needs adjusting gets noted and taken care of. A hinge may need a small tweak a few weeks later as the house goes through humidity changes, which is normal. If something comes up after the crew leaves, send a customer service request and we’ll set up a visit.
Quick prep checklist
- Confirm installation dates with your project manager.
- Pack rarely used items a week ahead; empty every cabinet and drawer being refaced the day before.
- Clear the countertops and the tops of wall cabinets.
- Set up a temporary kitchen station.
- Plan for pets and keep kids out of the work area.
- Reserve parking, clear the path and check building rules.
- Plan a day without the sink if countertops are being replaced.
- Block out time for the final walk-through.
Want the bigger picture first? See how a refacing project runs from consultation to walk-through, or start with what cabinet refacing includes.
Refacing day questions
Have a question we didn’t answer? Call (630) 555-0140 or send us a note.
Do I need to empty every cabinet before refacing?
Every cabinet and drawer being refaced needs to be empty, and in most kitchens that’s all of them. Cabinets that aren’t part of the project can stay as they are; your project manager will confirm which ones.
Do I need to be home during installation?
You don’t need to stay home all day, but someone should be there to let the crew in and answer questions. Plan to be home at the end of the last day for the final walk-through.
Can I use my kitchen while the cabinets are being refaced?
Mostly, yes. There’s no demolition, and the sink and appliances stay connected unless countertops are being replaced. Expect the kitchen to be a work area during the day and usable in the evening once it’s cleaned up.
What if something needs adjusting after the crew leaves?
Send a customer service request with a photo and a note on which door or drawer. Installation is covered by a 5-year workmanship warranty.